
Volt:模板引擎
概览
Volt 是一个用 C 编写的超快速且易于设计师使用的 PHP 模板引擎。它提供了一组辅助工具,便于视图编写。Volt 高度集成了 Phalcon 的其他组件,但也可以作为独立组件在你的应用中使用。
Volt 受以下引擎的启发:Jinja,最初由Armin Ronacher.
许多开发者会发现熟悉的语法,这些语法和他们之前使用的类似模板引擎相同。Volt 的语法和功能被增强了更多元素,并保持了开发者习惯于 Phalcon 的性能。
语法
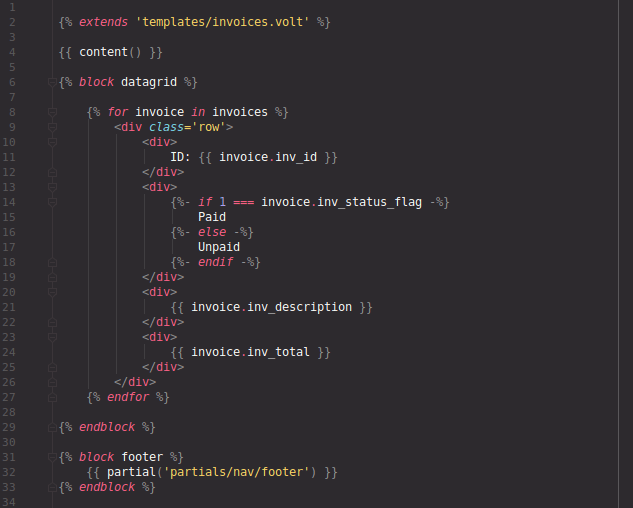
Volt 视图被编译为纯 PHP 代码,基本上节省了手动编写 PHP 代码的功夫:
{% for invoice in invoices %}
<div class='row'>
    <div>
        ID: {{ invoice.inv_id }}
    </div>
    <div>
        {%- if 1 === invoice.inv_status_flag -%}
        Paid
        {%- else -%}
        Unpaid
        {%- endif -%}
    </div>
    <div>
        {{ invoice.inv_description }}
    </div>
    <div>
        {{ invoice.inv_total }}
    </div>
</div>
{% endfor %}
相比于:
<?php foreach ($invoices as $invoice) { ?>
<div class='row'>
    <div>
        ID: <?= $invoice->inv_id; ?>
    </div>
    <div>
        <?php if (1 === $invoice->inv_status_flag) { ?>
        Paid
        <?php } else { ?>
        Unpaid
        <?php } ?>
    </div>
    <div>
        <?= $invoice->inv_description; ?>
    </div>
    <div>
        <?= $invoice->total; ?>
    </div>
</div>
<?php } ?>
构造函数
构造函数接受一个Phalcon\Mvc\View或者任何实现ViewBaseInterface接口的组件,以及 DI 容器。
方法
在 Volt 中有几个可用的方法。在大多数现代应用中只会用到其中一小部分。
检查宏是否定义并调用它
执行字符串转换
返回 Volt 的编译器
返回另一个视图阶段的缓存输出
返回 Volt 的选项
返回与适配器相关的视图组件
检查 needle 是否存在于 haystack 中
长度过滤器。如果传递的是数组/对象则执行 count,否则执行 strlen/mb_strlen
渲染另一个视图中的局部内容
使用模板引擎渲染视图
设置 Volt 的选项
从字符串/数组/可遍历对象值中提取一个切片
对数组进行排序
激活
与其他模板引擎一样,你可以将 Volt 注册到视图组件中,可以使用新的扩展名或者复用标准的.phtml:
<?php

use Phalcon\Di\FactoryDefault;
use Phalcon\Di\DiInterface;
use Phalcon\Mvc\ViewBaseInterface;
use Phalcon\Mvc\View;
use Phalcon\Mvc\View\Engine\Volt;

$container = new FactoryDefault();

$container->setShared(
    'voltService',
    function (ViewBaseInterface $view) use ($container) {
        $volt = new Volt($view, $container);
        $volt->setOptions(
            [
                'always'    => true,
                'extension' => '.php',
                'separator' => '_',
                'stat'      => true,
                'path'      => appPath('storage/cache/volt/'),
                'prefix'    => '-prefix-',
            ]
        );

        return $volt;
    }
);

$container->set(
    'view',
    function () {
        $view = new View();

        $view->setViewsDir('../app/views/');

        $view->registerEngines(
            [
                '.volt' => 'voltService',
            ]
        );

        return $view;
    }
);
要使用标准的.phtml扩展名:
你不必在 DI 中指定 Volt 服务;你也可以使用默认设置使用 Volt 引擎:
如果你不打算将 Volt 作为服务重用,你可以传递一个匿名函数来注册引擎而不是服务名称:
<?php

use Phalcon\Di\FactoryDefault;
use Phalcon\Di\DiInterface;
use Phalcon\Mvc\ViewBaseInterface;
use Phalcon\Mvc\View;
use Phalcon\Mvc\View\Engine\Volt;

$container = new FactoryDefault();

$container->set(
    'view',
    function () {
        $view = new View();

        $view->setViewsDir('../app/views/');
        $view->registerEngines(
            [
                '.volt' => function (ViewBaseInterface $view) {
                    $volt = new Volt($view, $this);

                    $volt->setOptions(
                        [
                            'always'    => true,
                            'extension' => '.php',
                            'separator' => '_',
                            'stat'      => true,
                            'path'      => appPath('storage/cache/volt/'),
                            'prefix'    => '-prefix-',
                        ]
                    );

                    return $volt;
                }
            ]
        );

        return $view;
    }
);
在 Volt 中有以下可用选项:
| 选项 | 默认值 | 描述 |
|---|---|---|
autoescape | false | 启用全局 HTML 自动转义 |
always | false | 是否每次请求时编译模板或仅当它们更改时编译 |
extension | .php | 添加到已编译 PHP 文件的额外扩展名 |
path | ./ | 用于放置已编译 PHP 模板的可写路径 |
separator | %% | 替换目录分隔符/和\用此分隔符生成单个文件在编译目录中 |
prefix | null | 在编译路径中的模板前添加一个前缀 |
stat | true | Phalcon 是否必须检查模板文件与其编译路径之间的差异 |
编译路径是根据上面的选项生成的。不过,你可以使用匿名函数完全自由地定义编译路径,包括用于生成它的逻辑。匿名函数接收模板在预定义views目录下。
添加扩展名
将.php扩展名附加到模板路径上,使已编译模板位于同一目录:
<?php

$volt->setOptions(
    [
        'path' => function ($templatePath) {
            return $templatePath . '.php';
        }
    ]
);
不同目录
以下示例将在不同目录中创建相同的结构
<?php

$volt->setOptions(
    [
        'path' => function (string $templatePath) {
            $dirName = dirname($templatePath);

            if (true !== is_dir('cache/' . $dirName)) {
                mkdir(
                    'cache/' . $dirName,
                    0777,
                    true
                );
            }

            return 'cache/' . $dirName . '/' . $templatePath . '.php';
        }
    ]
);
使用
Volt 使用特定的分隔符用于其语法。{%- raw -%}{% ... %}用于执行语句例如 for 循环或赋值,{%- raw -%}{{ ... }}则用于将表达式的结果打印到模板。如果你愿意的话,视图文件还可以包含 PHP 和 HTML。
下面是一个展示一些基础用法的模板示例:
{%- raw -%}
{# app/views/posts/show.phtml #}
<!DOCTYPE html>
<html>
    <head>
        <title>{{ title }} - An example blog</title>
    </head>
    <body>
        {% if true === showNavigation %}
        <ul id='navigation'>
            {% for item in menu %}
                <li>
                    <a href='{{ item.href }}'>
                        {{ item.caption }}
                    </a>
                </li>
            {% endfor %}
        </ul>
        {% endif %}

        <h1>{{ post.title }}</h1>

        <div class='content'>
            {{ post.content }}
        </div>

    </body>
</html>
使用Phalcon\Mvc\View你可以从控制器向视图传递变量。在上面的例子中,四个变量被传递给视图:showNavigation, menu, title和post:
<?php

use MyApp\Models\Menu;
use MyApp\Models\Post;
use Phalcon\Mvc\Controller;
use Phalcon\Mvc\View;

/**
 * @property View $view
 */
class PostsController extends Controller
{
    public function showAction()
    {
        $post = Post::findFirst();
        $menu = Menu::findFirst();

        $this->view->showNavigation = true;
        $this->view->menu           = $menu;
        $this->view->title          = $post->title;
        $this->view->post           = $post;

        // Or...

        $this->view->setVar('showNavigation', true);
        $this->view->setVar('menu',           $menu);
        $this->view->setVar('title',          $post->title);
        $this->view->setVar('post',           $post);
    }
}
注意
Volt 的占位符{{, }}, {%和%}不能更改或设置。
Vue.js
如果你在使用Vue你需要在 Vue 本身中更改插值方式:
Angular
如果你在使用Angular你可以如下设置插值方式:
  var myApp = angular.module('myApp', []);

  myApp.config(
    function ($interpolateProvider) {
        $interpolateProvider.startSymbol('<%');
        $interpolateProvider.endSymbol('%>');
    }
);
变量
对象变量可能具有可以通过语法访问的属性:foo.bar如果你传递的是数组,则必须使用方括号语法:foo['bar']
过滤器
变量可以使用过滤器来进行格式化或修改。管道操作符|用来对变量应用过滤器:
当前可用的内置过滤器有:
| Filter | 描述 |
|---|---|
abs | 应用absPHP 函数到某个值上。 |
capitalize | 通过应用ucwordsPHP 函数到值上 |
convert_encoding | 将字符串从一种字符集转换为另一种。 |
default | 如果评估的表达式为空、未设置或为假,则设置默认值。 |
e | 应用Phalcon\Html\Escaper->html()到该值上 |
escape | 应用Phalcon\Html\Escaper->html()到该值上 |
escape_attr | 应用Phalcon\Html\Escaper->attributes()到该值上 |
escape_css | 应用Phalcon\Html\Escaper->css()到该值上 |
escape_js | 应用Phalcon\Html\Escaper->js()到该值上 |
format | 使用sprintf |
json_encode | 将值转换为JSON表示形式 |
json_decode | 将值从它的JSON表示形式转换为 PHP 表示形式 |
join | 使用分隔符连接数组的部分join |
keys | 使用array_keys |
left_trim | 应用ltrimPHP 函数到值上。移除多余的空格 |
length | 计算字符串长度或数组或对象中项目的数量,等价于count |
lower | 将字符串转换为小写 |
nl2br | 将换行符更改\n用换行符(<br />)。使用 PHP 函数nl2br |
right_trim | 应用rtrimPHP 函数到值上。移除多余的空格 |
slashes | 应用addslashesPHP 函数到值上。 |
slice | 对字符串、数组或可遍历对象进行切片 |
sort | 使用 PHP 函数对数组进行排序asort |
stripslashes | 应用stripslashesPHP 函数到值上。移除转义引号 |
striptags | 应用striptagsPHP 函数到值上。移除 HTML 标签 |
trim | 应用trimPHP 函数到值上。移除多余的空格 |
upper | 应用strtoupperPHP 函数到值上。 |
url_encode | 应用urlencodePHP 函数到值上 |
示例
{%- raw -%}
{# e or escape filter #}
{{ '<h1>Hello<h1>'|e }}
{{ '<h1>Hello<h1>'|escape }}

{# trim filter #}
{{ '   hello   '|trim }}

{# striptags filter #}
{{ '<h1>Hello<h1>'|striptags }}

{# slashes filter #}
{{ ''this is a string''|slashes }}

{# stripslashes filter #}
{{ '\'this is a string\''|stripslashes }}

{# capitalize filter #}
{{ 'hello'|capitalize }}

{# lower filter #}
{{ 'HELLO'|lower }}

{# upper filter #}
{{ 'hello'|upper }}

{# length filter #}
{{ 'invoices'|length }}
{{ [1, 2, 3]|length }}

{# nl2br filter #}
{{ 'some\ntext'|nl2br }}

{# sort filter #}
{% set sorted = [3, 1, 2]|sort %}

{# keys filter #}
{% set keys = ['first': 1, 'second': 2, 'third': 3]|keys %}

{# join filter #}
{% set joined = 'a'..'z'|join(',') %}

{# format filter #}
{{ 'My real name is %s'|format(name) }}

{# json_encode filter #}
{% set encoded = invoices|json_encode %}

{# json_decode filter #}
{% set decoded = '{'one':1,'two':2,'three':3}'|json_decode %}

{# url_encode filter #}
{{ post.permanent_link|url_encode }}

{# convert_encoding filter #}
{{ 'désolé'|convert_encoding('utf8', 'latin1') }}
注释
注释也可以通过使用{%- raw -%}{# ... #}分隔符添加至模板中。其中的所有文本在最终输出时都将被忽略:
控制结构
Volt 提供了一套基础但强大的控制结构供在模板中使用:
对于
遍历序列中的每一个元素。下面的例子展示了如何遍历一组invoices并打印每个标题:
{%- raw -%}
<h1>Invoices</h1>
<ul>
    {% for invoice in invoices %}
    <li>
        {{ invoice.inv_title | e }}
    </li>
    {% endfor %}
</ul>
for 循环也可以嵌套:
{%- raw -%}
<h1>Invoices</h1>
{% for invoice in invoices %}
    {% for product in invoice.products %}
Product: {{ product.prd_title|e }} {{ product.prd_price|e }} USD <br />
    {% endfor %}
{% endfor %}
你可以获取元素keys如同在 PHP 中对应的实现,使用下列语法:
{%- raw -%}
{% set numbers = ['one': 1, 'two': 2, 'three': 3] %}

{% for name, value in numbers %}
    Name: {{ name }} Value: {{ value }} <br />
{% endfor %}
An if可以选择性地设置评估:
{%- raw -%}
{% set numbers = ['one': 1, 'two': 2, 'three': 3] %}

{% for value in numbers if value < 2 %}
    Value: {{ value }} <br />
{% endfor %}

{% for name, value in numbers if name !== 'two' %}
    Name: {{ name }} Value: {{ value }} <br />
{% endfor %}
如果已经定义了else在for内定义的,则当迭代器表达式导致零次迭代时将执行它:
{%- raw -%}
<h1>Invoices</h1>
{% for invoice in invoices %}
    Invoice: {{ invoice.inv_number | e }} - {{ invoice.inv_title | e }} <br />
{% else %}
    There are no invoices to show
{% endfor %}
替代语法:
{%- raw -%}
<h1>Invoices</h1>
{% for invoice in invoices %}
    Invoice: {{ invoice.inv_number | e }} - {{ invoice.inv_title | e }} <br />
{% elsefor %}
    There are no invoices to show
{% endfor %}
循环
The break和continue语句可用于退出循环或强制当前块内的迭代:
{%- raw -%}
{# skip the even invoices #}
{% for index, invoice in invoices %}
    {% if index is even %}
        {% continue %}
    {% endif %}
    ...
{% endfor %}
{%- raw -%}
{# exit the foreach on the first even invoice #}
{% for index, invoice in invoices %}
    {% if index is even %}
        {% break %}
    {% endif %}
    ...
{% endfor %}
如果
在 PHP 中,if语句检查一个表达式是否被计算为真或假:
{%- raw -%}
<h1>Paid Invoices</h1>
<ul>
    {% for invoice in invoices %}
        {% if invoice.inv_paid_flag === 1 %}
            <li>{{ invoice.inv_title | e }}</li>
        {% endif %}
    {% endfor %}
</ul>
同样支持 else 子句:
{%- raw -%}
<h1>Invoices</h1>
<ul>
    {% for invoice in invoices %}
        {% if invoice.inv_paid_flag === 1 %}
            <li>{{ invoice.inv_title | e }}</li>
        {% else %}
            <li>{{ invoice.inv_title | e }} [NOT PAID]</li>
        {% endif %}
    {% endfor %}
</ul>
The elseif控制流结构可以与 if 一起使用来模拟switch块:
{%- raw -%}
{% if invoice.inv_paid_flag === constant('MyApp\Constants\Status::PAID') %}
    Invoice is paid
{% elseif invoice.inv_paid_flag === 2 %}
    Invoice is not paid
{% else %}
    Invoice is paid status is not defined
{% endif %}
Switch(开关)
一种替代if语句的方法是switch,允许你在应用程序中创建逻辑执行路径:
{%- raw -%}
{% switch foo %}
    {% case 0 %}
    {% case 1 %}
    {% case 2 %}
        "foo" is less than 3 but not negative
        {% break %}
    {% case 3 %}
        "foo" is 3
        {% break %}
    {% default %}
        "foo" is {{ foo }}
{% endswitch %}
The switch语句逐条执行语句,因此某些情况下必须使用break语句。任意输出(包括空白字符)位于 switch 语句和第一个case之间都会导致语法错误。因此,清除空行和空白字符可以减少错误数量查看详情.
case没有switch
将抛出Fatal error: Uncaught Phalcon\Mvc\View\Exception: Unexpected CASE.
switch没有endswitch
将抛出Fatal error: Uncaught Phalcon\Mvc\View\Exception: Syntax error, unexpected EOF in ..., there is a 'switch' block without 'endswitch'.
default没有switch
default是保留字,用于如{%- raw -%}{{ EXPRESSION | default(VALUE) }}这样的过滤器,但在这种情况下,该表达式只会输出一个空字符'' . 嵌套switch
将抛出Fatal error: Uncaught Phalcon\Mvc\View\Exception: A nested switch detected. There is no nested switch-case statements support in ... on line ...
a switch没有表达式
将抛出Fatal error: Uncaught Phalcon\Mvc\View\Exception: Syntax error, unexpected token {%- raw -%}%} in ... on line ...
循环上下文
一个特殊变量可在for循环内使用
| 变量 | 描述 |
|---|---|
loop.first | 如果是第一次迭代则为真。 |
loop.index | 当前循环的迭代次数。(从1开始索引) |
loop.index0 | 当前循环的迭代次数。(从0开始索引) |
loop.length | 要迭代的项目总数 |
loop.last | 如果是最后一次迭代则为真。 |
loop.revindex | 到循环结束还有多少次迭代(从1开始索引) |
loop.revindex0 | 到循环结束还有多少次迭代(从0开始索引) |
示例:
{%- raw -%}
{% for invoice in invoices %}
    {% if loop.first %}
        <table>
            <tr>
                <th>#</th>
                <th>Id</th>
                <th>Title</th>
            </tr>
    {% endif %}
            <tr>
                <td>{{ loop.index }}</td>
                <td>{{ invoice.inv_id }}</td>
                <td>{{ invoice.inv_title }}</td>
            </tr>
    {% if loop.last %}
        </table>
    {% endif %}
{% endfor %}
赋值
你可以通过指令在模板中改变变量set:
同一条指令中允许多个赋值:
{%- raw -%}
{% set fruits = ['Apple', 'Banana', 'Orange'], name = invoice.inv_title, active = true %}
此外,你还可以使用复合赋值运算符:
支持以下运算符:
| 运算符 | 描述 |
|---|---|
= | 普通赋值 |
+= | 加法赋值 |
-= | 减法赋值 |
\*= | 乘法赋值 |
/= | 除法赋值 |
表达式
Volt 提供了基本的表达式支持,包括字面量和常用运算符。可以使用{%- raw -%}{{和{%- raw -%}}}分隔符对表达式进行计算并打印:
如果需要计算某个表达式而不进行打印,可以使用do语句:
字面量
支持以下字面量:
| Filter | 描述 |
|---|---|
'this is a string' | 双引号或单引号之间的文本将作为字符串处理 |
100.25 | 包含小数部分的数字将作为双精度浮点数处理 |
100 | 不包含小数部分的数字将作为整数处理 |
false | 常量false是布尔值false值 |
true | 常量true是布尔值true值 |
null | 常量null是null值 |
数组
你可以通过将一系列值放在方括号内来创建数组:
{%- raw -%}
{# Simple array #}
{{ ['Apple', 'Banana', 'Orange'] }}

{# Other simple array #}
{{ ['Apple', 1, 2.5, false, null] }}

{# Multi-Dimensional array #}
{{ [[1, 2], [3, 4], [5, 6]] }}

{# Hash-style array #}
{{ ['first': 1, 'second': 4/2, 'third': '3'] }}
大括号也可用于定义数组或哈希:
{%- raw -%}
{% set myArray = {'Apple', 'Banana', 'Orange'} %}
{% set myHash  = {'first': 1, 'second': 4/2, 'third': '3'} %}
数学运算
你可以在模板中使用以下运算符进行计算:
| 运算符 | 描述 |
|---|---|
+ | 执行加法操作。{%- raw -%}{{ 2 + 3 }}返回 5 |
- | 执行减法操作{%- raw -%}{{ 2 - 3 }}返回 -1 |
* | 执行乘法操作{%- raw -%}{{ 2 * 3 }}返回 6 |
/ | 执行除法操作{%- raw -%}{{ 10 / 2 }}返回 5 |
% | 计算整数除法的余数{%- raw -%}{{ 10 % 3 }}返回 1 |
比较
支持以下比较运算符:
| 运算符 | 描述 |
|---|---|
== | 检查两个操作数是否相等 |
!= | 检查两个操作数是否不相等 |
<> | 检查两个操作数是否不相等 |
> | 检查左操作数是否大于右操作数 |
< | 检查左操作数是否小于右操作数 |
<= | 检查左操作数是否小于等于右操作数 |
>= | 检查左操作数是否大于等于右操作数 |
=== | 检查两个操作数是否完全相同 |
!== | 检查两个操作数是否不完全相同 |
逻辑
逻辑运算符在if表达式计算中有用,用于组合多个测试:
| 运算符 | 描述 |
|---|---|
or | 若左或右操作数被计算为真则返回真 |
and | 若左右操作数都被计算为真则返回真 |
not | 对表达式进行取反 |
( expr ) | 圆括号用于分组表达式 |
其他运算符
可见的其他运算符如下:
| 运算符 | 描述 |
|---|---|
~ | 将两个操作数进行连接{%- raw -%}{{ 'hello ' ~ 'world' }} |
| | 将右边的操作数中的过滤器应用到左边{%- raw -%}{{ 'hello' | uppercase }} |
.. | 创建一个范围{%- raw -%}{{ 'a'..'z' }} {%- raw -%}{{ 1..10 }} |
is | 等同于 ==(等于),也用于执行测试 |
in | 检查一个表达式是否被包含在其他表达式中if 'a' in 'abc' |
is not | 等同于 !=(不等于) |
'a' ? 'b' : 'c' | 三元运算符。与 PHP 的三元运算符相同 |
++ | 对一个值进行自增 |
-- | 对一个值进行自减 |
下例展示如何使用运算符:
{%- raw -%}
{% set fruits = ['Apple', 'Banana', 'Orange', 'Kiwi'] %}

{% for index in 0..fruits | length %}
    {% if invoices[index] is defined %}
        {{ 'Name: ' ~ invoices[index] }}
    {% endif %}
{% endfor %}
测试
测试可用于检查变量是否具有有效预期值。运算符is用于执行这些测试:
{%- raw -%}
{% set invoices = ['1': 'Apple', '2': 'Banana', '3': 'Orange'] %}

{% for position, name in invoices %}
    {% if position is odd %}
        {{ name }}
    {% endif %}
{% endfor %}
Volt 中提供了以下内置测试:
| 测试 | 描述 |
|---|---|
defined | 检查变量是否已定义 (isset()) |
divisibleby | 检查一个值是否可以被另一个值整除 |
empty | 检查变量是否为空 |
even | 检查数值是否为偶数 |
iterable | 检查值是否可迭代。可以通过 'for' 语句遍历 |
numeric | 检查值是否为数字类型 |
odd | 检查数值是否为奇数 |
sameas | 检查一个值是否与另一个值完全相同 |
scalar | 检查值是否为标量(不是数组或对象) |
type | 检查值是否为指定类型 |
更多示例:
{%- raw -%}
{% if invoice is defined %}
    The invoice variable is defined
{% endif %}

{% if invoice is empty %}
    The invoice is null or is not defined
{% endif %}

{% for key, name in [1: 'Apple', 2: 'Banana', 3: 'Orange'] %}
    {% if key is even %}
        {{ name }}
    {% endif %}
{% endfor %}

{% for key, name in [1: 'Apple', 2: 'Banana', 3: 'Orange'] %}
    {% if key is odd %}
        {{ name }}
    {% endif %}
{% endfor %}

{% for key, name in [1: 'Apple', 2: 'Banana', 'third': 'Orange'] %}
    {% if key is numeric %}
        {{ name }}
    {% endif %}
{% endfor %}

{% set invoices = [1: 'Apple', 2: 'Banana'] %}
{% if invoices is iterable %}
    {% for invoice in invoices %}
        ...
    {% endfor %}
{% endif %}

{% set world = 'hello' %}
{% if world is sameas('hello') %}
    {{ 'it's hello' }}
{% endif %}

{% set external = false %}
{% if external is type('boolean') %}
    {{ 'external is false or true' }}
{% endif %}
宏
宏可用于在模板中复用逻辑,它们作用类似于 PHP 函数,可以接收参数并返回值:
{%- raw -%}
{# Macro 'display a list of links to related topics' #}
{%- macro related_bar(related_links) %}
    <ul>
        {%- for link in related_links %}
        <li>
            <a href='{{ url(link.url) }}'
               title='{{ link.title|striptags }}'>
                {{ link.text }}
            </a>
        </li>
        {%- endfor %}
    </ul>
{%- endmacro %}

{# Print related links #}
{{ related_bar(links) }}

<div>This is the content</div>

{# Print related links again #}
{{ related_bar(links) }}
调用宏时,参数可以通过名称传递:
{%- raw -%}
{%- macro error_messages(message, field, type) %}
    <div>
        <span class='error-type'>{{ type }}</span>
        <span class='error-field'>{{ field }}</span>
        <span class='error-message'>{{ message }}</span>
    </div>
{%- endmacro %}

{# Call the macro #}
{{
    error_messages(
        'type': 'Invalid',
        'message': 'The name is not valid',
        'field': 'name'
    )
}}
宏可以返回值:
{%- raw -%}
{%- macro my_input(name, class) %}
    {% return text_field(name, 'class': class) %}
{%- endmacro %}

{# Call the macro #}
{{ '<p>' ~ my_input('name', 'input-text') ~ '</p>' }}
并接收可选参数:
{%- raw -%}
{%- macro my_input(name, class='input-text') %}
    {% return text_field(name, 'class': class) %}
{%- endmacro %}

{# Call the macro #}
{{ '<p>' ~ my_input('name') ~ '</p>' }}
{{ '<p>' ~ my_input('name', 'input-text') ~ '</p>' }}
标签助手
Volt 与Phalcon\Html\TagFactory高度集成,因此很容易在 Volt 模板中使用该组件提供的助手:
{%- raw -%}
{{ script().add('js/jquery.js') }}

{{ form(['action' : 'products/save', 'method': 'post']) }}

    <label for='name'>Name</label>
    {{ inputText('name', null, ['size': 32]) }}

    <label for='type'>Type</label>
    {% for productType in productTypes }}
    {{ inputSelect().addPlaceholder('...').add(productType.name, productType.id) }}
    {% endfor %}

    {{ inputSubmit('Send') }}

{{ close('form') }}
下面是生成的 PHP 代码:
<?= $this->tag->script("\t", "\n\n") ?>

<?= $this->tag->form(['products/save', 'method' : 'post']); ?>

    <label for='name'>Name</label>
    <?= $this->tag->inputText(['name', 'size' : 32]); ?>

    <label for='type'>Type</label>
    <?php foreach ($productTypes as $productType) { ?>
    <?= $this->tag->addPlaceholder('...').add(productType.name, productType.id); ?>
    <?php } ?>

    <?= $this->tag->inputSubmit('Send'); ?>

<?= $this->tag->close('form'); ?>
您可以直接在 Volt 中调用Phalcon\Html\TagFactory提供的任意助手。
| Volt 函数 | 类 |
|---|---|
a | Phalcon\Html\Helper\Anchor |
base | Phalcon\Html\Helper\Base |
body | Phalcon\Html\Helper\Body |
button | Phalcon\Html\Helper\Button |
close | Phalcon\Html\Helper\Close |
doctype | Phalcon\Html\Helper\Doctype |
element | Phalcon\Html\Helper\Element |
form | Phalcon\Html\Helper\Form |
img | Phalcon\Html\Helper\Img |
inputCheckbox | Phalcon\Html\Helper\Input\Checkbox |
inputColor | Phalcon\Html\Helper\Input\Color |
inputDate | Phalcon\Html\Helper\Input\Date |
inputDateTime | Phalcon\Html\Helper\Input\DateTime |
inputDateTimeLocal | Phalcon\Html\Helper\Input\DateTimeLocal |
inputEmail | Phalcon\Html\Helper\Input\Email |
inputFile | Phalcon\Html\Helper\Input\File |
inputHidden | Phalcon\Html\Helper\Input\Hidden |
inputImage | Phalcon\Html\Helper\Input\Image |
inputInput | Phalcon\Html\Helper\Input\Input |
inputMonth | Phalcon\Html\Helper\Input\Month |
inputNumeric | Phalcon\Html\Helper\Input\Numeric |
inputPassword | Phalcon\Html\Helper\Input\Password |
inputRadio | Phalcon\Html\Helper\Input\Radio |
inputRange | Phalcon\Html\Helper\Input\Range |
inputSearch | Phalcon\Html\Helper\Input\Search |
inputSelect | Phalcon\Html\Helper\Input\Select |
inputSubmit | Phalcon\Html\Helper\Input\Submit |
inputTel | Phalcon\Html\Helper\Input\Tel |
inputText | Phalcon\Html\Helper\Input\Text |
inputTextarea | Phalcon\Html\Helper\Input\Textarea |
inputTime | Phalcon\Html\Helper\Input\Time |
inputUrl | Phalcon\Html\Helper\Input\Url |
inputWeek | Phalcon\Html\Helper\Input\Week |
label | Phalcon\Html\Helper\Label |
link | Phalcon\Html\Helper\Link |
meta | Phalcon\Html\Helper\Meta |
ol | Phalcon\Html\Helper\Ol |
script | Phalcon\Html\Helper\Script |
style | Phalcon\Html\Helper\Style |
title | Phalcon\Html\Helper\Title |
ul | Phalcon\Html\Helper\Ul |
此外,您还可以使用Phalcon\Tag助手方法。您只需调用该方法的非驼峰命名版本:
| Volt 函数 | 方法 |
|---|---|
check_field | Phalcon\Tag::checkField |
date_field | Phalcon\Tag::dateField |
email_field | Phalcon\Tag::emailField |
end_form | Phalcon\Tag::endForm |
file_field | Phalcon\Tag::fileField |
form_legacy | Phalcon\Tag::form |
friendly_title | Phalcon\Tag::friendlyTitle |
get_title | Phalcon\Tag::getTitle |
hidden_field | Phalcon\Tag::hiddenField |
image | Phalcon\Tag::image |
javascript_include | Phalcon\Tag::javascriptInclude |
link_to | Phalcon\Tag::linkTo |
numeric_field | Phalcon\Tag::numericField |
password_field | Phalcon\Tag::passwordField |
radio_field | Phalcon\Tag::radioField |
select | Phalcon\Tag::select |
select_static | Phalcon\Tag::selectStatic |
stylesheet_link | Phalcon\Tag::stylesheetLink |
submit_button | Phalcon\Tag::submitButton |
text_area | Phalcon\Tag::textArea |
text_field | Phalcon\Tag::textField |
函数
Volt 中提供了以下内置函数:
| 名称 | 描述 |
|---|---|
constant | 读取一个 PHP 常量 |
content | 包含之前渲染阶段生成的内容 |
date | 调用同名的 PHP 函数 |
dump | 调用 PHP 函数var_dump() |
get_content | 与content |
partial | 在当前模板中动态加载一个局部视图 |
static_url | 使用url服务生成一个 URL |
super | 渲染父区块的内容 |
time | 调用同名的 PHP 函数 |
url | 使用url服务生成一个 URL |
version | 返回框架的当前版本 |
version_id | 返回框架的当前版本 ID |
视图
此外,Volt 也集成了Phalcon\Mvc\View,所以您可以操作视图层级并包含局部内容:
{%- raw -%}
{{ content() }}

<div id='footer'>
    {{ partial('partials/footer') }}
    {{ partial('partials/footer', ['links': links]) }}
</div>
局部内容在运行时被包含,Volt 还提供include,它会编译一个视图的内容,并将其内容作为包含它的视图的一部分返回:
{%- raw -%}
<div id='footer'>
    {% include 'partials/footer' %}
    {% include 'partials/footer' with ['links': links] %}
</div>
包含
include具有特殊行为,当使用 Volt 时这有助于提升一点性能,如果您在包含文件时指定了扩展名,且在模板编译时该文件存在,那么 Volt 可以将模板的内容内联到父模板中的包含位置。如果include包含通过with:
局部 Vs 包含
在选择使用partial函数还是include:
| 类型 | 描述 |
|---|---|
partial | 允许您包含使用 Volt 和其他模板引擎制作的模板。同时允许您传递一个表达式,例如一个变量,从而让您动态地包含另一个视图的内容。如果所要包含的内容经常变化,则更适合使用此方法 |
includes | 复制编译后的内容到视图中,从而提高性能。只允许包含使用 Volt 制作的模板。要求在编译时存在现有模板 |
继承
使用模板继承,您可以创建基础模板,其他模板可以通过继承它来实现代码复用。基础模板定义了可由子模板覆盖的区块。假设我们有如下基础模板:
{%- raw -%}
{# templates/base.volt #}
<!DOCTYPE html>
<html>
<head>
{% block head %}
<link rel='stylesheet' href='style.css' />
{% endblock %}
<title>{% block title %}{% endblock %} - My Webpage</title>
</head>
<body>
<div id='content'>{% block content %}{% endblock %}</div>
<div id='footer'>
{% block footer %}
© Copyright 2012-present.
All rights reserved.
{% endblock %}
</div>
</body>
</html>
从其他模板中,我们可以替换区块来扩展基础模板:
{%- raw -%}
{% extends 'templates/base.volt' %}

{% block title %}Index{% endblock %}

{% block head %}<style>.important { color: #336699; }</style>{% endblock %}

{% block content %}
    <h1>Index</h1>
    <p class='important'>Welcome on my awesome homepage.</p>
{% endblock %}
子模板中并非所有区块都必须替换,仅需替换所需的部分。最终输出结果将是如下所示:
<!DOCTYPE html>
<html>
<head>
<style>.important { color: #336699; }</style>
<title>Index - My Webpage</title>
</head>
<body>
<div id='content'>
<h1>Index</h1>
<p class='important'>Welcome on my awesome homepage.</p>
</div>
<div id='footer'>
© Copyright 2012-present.
All rights reserved.
</div>
</body>
</html>
多级继承
扩展模板也可以继承其他模板。下面的例子说明了这一点:
{%- raw -%}
{# main.volt #}
<!DOCTYPE html>
<html>
    <head>
        <title>Title</title>
    </head>

    <body>
        {% block content %}{% endblock %}
    </body>
</html>
模板layout.volt扩展了main.volt
{%- raw -%}
{# layout.volt #}
{% extends 'main.volt' %}

{% block content %}

    <h1>Table of contents</h1>

{% endblock %}
最终,一个扩展了layout.volt:
{%- raw -%}
{# index.volt #}
{% extends 'layout.volt' %}

{% block content %}

    {{ super() }}

    <ul>
        <li>Some option</li>
        <li>Some other option</li>
    </ul>

{% endblock %}
渲染index.volt的视图会产生如下结果:
<!DOCTYPE html>
<html>
    <head>
        <title>Title</title>
    </head>

    <body>

        <h1>Table of contents</h1>

        <ul>
            <li>Some option</li>
            <li>Some other option</li>
        </ul>

    </body>
</html>
注意对函数super()的调用。通过此函数,可以渲染父区块的内容。和局部一样,extends设置的路径是一个相对于当前视图目录的相对路径(即app/views/)。
注意
默认情况下,出于性能考虑,Volt 仅检查子模板是否发生变化以决定是否重新编译为纯 PHP,因此建议使用选项'always' => true初始化 Volt。这样,模板在编译时总会考虑到父模板的变化。
自动转义模式
您可以通过启用自动转义模式来转义区块中打印的所有变量:
{%- raw -%}
Manually escaped: {{ invoice.inv_title|e }}

{% autoescape true %}
    Autoescaped: {{ invoice.inv_title }}
    {% autoescape false %}
        No Autoescaped: {{ invoice.inv_title }}
    {% endautoescape %}
{% endautoescape %}
扩展 Volt
与其他模板引擎不同,运行编译后的模板本身不需要 Volt。一旦模板被编译,就不再依赖 Volt。为了实现性能上的独立性,Volt 仅仅充当 PHP 模板的编译器。
Volt 编译器允许您通过添加更多函数、测试或过滤器来扩展它。
函数
函数的行为类似于普通的 PHP 函数,需要一个有效的字符串名称作为函数名。函数可以通过两种方式添加:返回一个简单的字符串或者使用匿名函数。无论使用哪种方式,都必须返回一个有效的 PHP 字符串表达式。
下面的例子将 Volt 中的函数名shuffle绑定到 PHP 函数str_shuffle:
<?php

use Phalcon\Mvc\View\Engine\Volt;

$volt = new Volt($view, $container);

$compiler = $volt->getCompiler();

$compiler->addFunction('shuffle', 'str_shuffle');
在 Volt 中:
下面的例子使用匿名函数注册该函数。在这里我们使用$resolvedArgs来在视图中调用方法时精确传递参数:
<?php

$compiler->addFunction(
    'widget',
    function ($resolvedArgs, $exprArgs) {
        return 'MyLibrary\Widgets::get(' . $resolvedArgs . ')';
    }
);
在 Volt 中:
您还可以独立处理参数,并检查未解析的参数是否存在。在下面的例子中,我们先获取第一个参数,然后检查是否存在第二个参数。如果存在则使用它,否则使用默认值10最后,我们调用str_repeat第一个和第二个参数上的 PHP 方法。
<?php

$compiler->addFunction(
    'repeat',
    function ($resolvedArgs, $exprArgs) use ($compiler) {
        $firstArgument = $compiler->expression($exprArgs[0]['expr']);

        if (isset($exprArgs[1])) {
            $secondArgument = $compiler->expression($exprArgs[1]['expr']);
        } else {
            $secondArgument = '10';
        }

        return 'str_repeat(' . $firstArgument . ', ' . $secondArgument . ')';
    }
);
在 Volt 中:
您还可以检查系统中函数的可用性,并在存在时调用它们。在下面的例子中,我们将调用mb_stripos如果没有使用mbstring扩展是否存在。如果存在,则mb_stripos将被调用,否则stripos:
<?php

$compiler->addFunction(
    'contains_text',
    function ($resolvedArgs, $exprArgs) {
        if (true === function_exists('mb_stripos')) {
            return 'mb_stripos(' . $resolvedArgs . ')';
        } else {
            return 'stripos(' . $resolvedArgs . ')';
        }
    }
);
您还可以通过使用相同名称的定义函数来覆盖内置函数。在下面的例子中,我们replace覆盖了 Volt 的内置函数dump()为 PHP 的print_r.
过滤器
过滤器在模板中的形式如下:leftExpr|name(optional-args)。添加新过滤器与添加函数类似。
添加一个名为hash实例,使用sha1方法:
添加一个名为int:
<?php

$compiler->addFilter(
    'int',
    function ($resolvedArgs, $exprArgs) {
        return 'intval(' . $resolvedArgs . ')';
    }
);
可以通过添加同名函数来覆盖内置过滤器。以下示例将替换内置的capitalize过滤器为 PHP 的lcfirst函数:
扩展
通过扩展,开发人员可以更灵活地扩展模板引擎、覆盖指令编译、更改表达式或运算符的行为、添加函数/过滤器等功能。
扩展是一个类,它将 Volt 触发的事件实现为自己类的方法。例如,下面的类允许在 Volt 中使用任何 PHP 函数:
<?php

namespace MyApp\View\Extensions;

class PhpFunctionExtension
{
    public function compileFunction(string $name, string $arguments)
    {
        if (true === function_exists($name)) {
            return $name . '('. $arguments . ')';
        }
    }
}
上述类实现了方法compileFunction该方法在编译任何模板中的函数调用之前调用。扩展的目的是验证要编译的函数是否是允许从模板调用 PHP 函数的 PHP 函数。扩展中的事件必须返回有效的 PHP 代码,该代码将作为编译结果使用,而非 Volt 生成的代码。如果事件没有返回字符串,则使用引擎提供的默认行为进行编译。
Volt 扩展必须在编译器中注册,以便在编译时可用:
<?php

use MyApp\View\Extensions\PhpFunctionExtension;

$compiler->addExtension(
    new PhpFunctionExtension()
);
编译器
Volt 编译器依赖于 Volt 解析器。解析器解析 Volt 模板并从中创建中间表示(IR)。编译器使用该表示并生成编译后的 PHP 代码。
<?php

use Phalcon\Mvc\View\Engine\Volt\Compiler;

$compiler = new Compiler();

$compiler->compile("views/partials/header.volt");

require $compiler->getCompiledTemplatePath();
The Phalcon\Mvc\View\Engine\Volt\Compiler提供了许多可扩展的方法以满足您的应用需求。
构造函数 注册一个扩展 注册一个新过滤器 注册一个新函数 解析属性读取 根据编译器选项将模板编译成文件。如果模板未被编译,此方法不会返回编译后的路径 编译 "autoescape" 语句并返回 PHP 代码/**
* @deprecated Will be removed in 5.0
*/
public function compileCache(
array $statement,
bool $extendsMode = false
): string
cache语句并返回 PHP 代码 编译宏调用 编译一个case/default子句并返回 PHP 代码 编译一个do语句并返回 PHP 代码 编译一个{{ }}语句并返回 PHP 代码 编译一个elseif语句并返回 PHP 代码 public function compileFile(
string $path,
string $compiledPath,
bool $extendsMode = false
): string | array
foreach语句并返回 PHP 代码 编译一个forelse语句并返回 PHP 代码 编译一个if语句并返回 PHP 代码 编译一个include语句并返回 PHP 代码 编译一个宏 编译一个return语句并返回 PHP 代码 编译 "set" 语句并返回 PHP 代码。该方法接受由 Volt 解析器生成的数组并创建相应的setPHP 语句。由于需要对 Volt 解析器有深入了解,在开发过程中这个方法并不特别有用。 <?php
use Phalcon\Mvc\View\Engine\Volt\Compiler;
$compiler = new Compiler();
// {% set a = ['first': 1] %}
$source = [
"type" => 306,
"assignments" => [
[
"variable" => [
"type" => 265,
"value" => "a",
"file" => "eval code",
"line" => 1
],
"op" => 61,
"expr" => [
"type" => 360,
"left" => [
[
"expr" => [
"type" => 258,
"value" => "1",
"file" => "eval code",
"line" => 1
],
"name" => "first",
"file" => "eval code",
"line" => 1
]
],
"file" => "eval code",
"line" => 1
],
"file" => "eval code",
"line" => 1
]
]
];
echo $compiler->compileSet($source);
// <?php $a = ['first' => 1]; ?>
switch语句并返回 PHP 代码 解析 AST volt 树中的表达式节点 将函数中间代码解析为 PHP 函数调用 返回最近编译的模板路径 返回已注册的扩展 返回已注册的用户过滤器 返回已注册的用户函数 返回一个编译器选项 返回编译器选项 返回当前正在编译的路径 返回一个唯一前缀,作为编译变量和上下文的前缀 解析 Volt 模板并返回其中间表示 将过滤器中间代码解析为有效的 PHP 表达式 设置单个编译器选项 设置编译器选项 设置一个唯一前缀,作为编译变量的前缀 事件
下面的编译事件可以在扩展中实现:
| 事件/方法 | 描述 |
|---|---|
compileFunction | 在尝试编译模板中的任何函数调用之前触发 |
compileFilter | 在尝试编译模板中的任何过滤器调用之前触发 |
resolveExpression | 在尝试编译任何表达式之前触发。这允许开发者覆盖运算符 |
compileStatement | 在尝试编译任何语句之前触发。这允许开发者覆盖任何语句 |
服务
如果服务容器 (DI) 对 Volt 可用。DI 容器中注册的任何服务都可在 Volt 中使用,变量名与服务注册时所使用的名称相同。在下面的示例中我们使用flash服务以及security监听器:
{%- raw -%}
<div id='messages'>{{ flash.output() }}</div>
<input type='hidden' name='token' value='{{ security.getToken() }}'>
独立使用
您可以在任何应用程序中作为独立组件使用 Volt。
注册编译器并设置一些选项:
<?php

use Phalcon\Mvc\View\Engine\Volt\Compiler as VoltCompiler;

$compiler = new VoltCompiler();
$compiler->setOptions(
    [
        // ...
    ]
);
模板或字符串的编译:
<?php

echo $compiler->compileString(
    "{{ 'hello' }}"
);

$compiler->compileFile(
    'layouts/main.volt',
    'cache/layouts/main.volt.php'
);

$compiler->compile(
    'layouts/main.volt'
);
最终如有需要,您可以包含编译后的模板:
编译
每次将应用部署到生产环境时,都需要删除预编译的.volt文件,这样您在模板中所做的修改才能显示给用户。一种非常简单的方法是使用 CLI 脚本清理volt/文件夹或手动删除所有文件。
假设您的volt路径位于:/app/storage/cache/volt/则运行以下脚本可以在任何时候清空该文件夹,通常在部署之后运行。
<?php

use RecursiveDirectoryIterator;
use RecursiveIteratorIterator;
use function in_array;
use function substr;

$fileList    = [];
$whitelist   = ['.', '..', '.gitignore'];
$path        = appPath('storage/cache');
$dirIterator = new RecursiveDirectoryIterator($path);
$iterator    = new RecursiveIteratorIterator(
    $dirIterator,
    RecursiveIteratorIterator::CHILD_FIRST
);

foreach ($iterator as $file) {
    if (true !== $file->isDir() &&
        true !== in_array($file->getFilename(), $whitelist)) {
        $fileList[] = $file->getPathname();
    }
}

echo sprintf('Found %s files', count($fileList)) . PHP_EOL;
foreach ($fileList as $file) {
    echo '.';
    unlink($file);
}

echo PHP_EOL . 'Folder cleared' . PHP_EOL;
在上面的例子中,我们使用了 PHP 的RecursiveDirectoryIterator和RecursiveIteratorIterator来递归遍历一个文件夹,并在$fileList数组中创建文件列表。之后,我们遍历该数组并逐个unlink文件。
如上所述,根据设置期间提供的选项,Volt 可以检查编译后的文件是否存在并按需生成它们。此外,Volt 还可以检查文件是否已更改,并在需要时重新生成。
这些检查是在always和stat选项被设置为true时执行的。对于任何项目来说,在每个请求中多次检查文件系统(每个 Volt 文件检查一次)会消耗资源。此外,您还需要确保 Volt 用于编译模板的文件夹对您的 Web 服务器是可写的。
您可以创建一个脚本或 CLI 任务(使用命令行应用程序)在部署代码时编译并保存所有 Volt 文件。这样,您可以指示 Volt 不再逐一编译或检查每个文件的状态,从而提升性能。此外,由于这些文件是在部署过程中编译的,因此 volt 文件夹将不需要可写权限,提高了安全性。由于已编译的 Volt 模板是 phtml 片段,不允许 Web 服务器生成可执行代码始终是一个好主意。
请记住,此脚本将在命令行下执行,但为了编译我们的模板,我们需要引导我们的 Web 应用程序。在下面的示例中,我们将需要获取包含我们 Web 应用程序所有注册服务的 DI 容器。然后我们可以使用 Volt 编译器将所有模板编译到相关文件夹。
在下面的示例中,我们假设我们有一个Bootstrap\Web类,它负责为 Web 应用程序设置所有服务。该类通过getContainer()返回 DI 容器。您的实现可能会有所不同。
<?php

use MyApp\Library\Bootstrap\Web;
use RecursiveDirectoryIterator;
use RecursiveIteratorIterator;
use function in_array;
use function substr;

if (php_sapi_name() !== "cli") {
    throw new Exception(
        'You need to run this script from the command line'
    );
}

$bootstrap = new Web();
$container = $bootstrap->getContainer();
$view      = $container->getShared('view');
$viewPath  = $view->getViewsDir();
$volt      = $container->getShared('volt');

$fileList    = [];
$whitelist   = ['.', '..', '.gitignore'];
$path        = $viewPath;
$dirIterator = new RecursiveDirectoryIterator($path);
$iterator    = new RecursiveIteratorIterator(
    $dirIterator,
    RecursiveIteratorIterator::CHILD_FIRST
);

foreach ($iterator as $file) {
    if (true !== $file->isDir() &&
        true !== in_array($file->getFilename(), $whitelist)) {
        $fileList[] = $file->getPathname();
    }
}

echo sprintf('Found %s files', count($fileList)) . PHP_EOL;
foreach ($fileList as $file) {
    echo '.';
    $volt->getCompiler()->compile($file);
}

echo PHP_EOL . 'Templates compiled' . PHP_EOL;